Many of us just hate to throw anything away. This is especially true when we can take something old and turn into something new again with a simple project. This table saw wall clock is one of those projects. You'll be stunned when you see how it turns out!
Let's Get Started!
The Materials You Need To Gather:
Old table saw blade
Screws
Wood
Glue
Clock mechanism and hands
A drill
A router
A table saw
A sander
Clamps
The Step By Step Directions To Follow:
1 Make wooden backplate
Start by cutting wooden planks to size. Either measure them precisely before cutting , or cut them to similar sizes, cut proper square once they are glued together.After cutting pieces to size, apply glue to sides, spread out evenly, tightly clamp them together. Once glue has dried , trim unwanted edges, sand wood until you are happy with the appearance.
2 Attach saw blade
Before attaching blade, sand it down to finish that you like. Just be careful of accidentally damaging natural circular grind lines of blade.Place blade in centre of square, screw it into place. If you are worried that something will go wrong, I have 4 different solutions for you!
Clamp blade into position.
Mark holes, remove blade, drill guide holes on markings. Put blade back in place, insert screws into guide holes.
If you started drilling/screwing then realised you are not in the right spot, just rotate blade so that it hides incorrect hole.
If you are done attaching blade then realise it is not centred, trim some wood from side where there is excess space.
The Additional Directions To Follow:
Next Attach your Machine
Make sure to find the center of the square, then drill a hole that is large enough for the mechanism shaft to be inserted in. Make sure that you are drilling from front to back so that you don't damage your display side. Then take a router to clear a big area on the back to allow your mechanism back to fit into place. Finally, just attach the hands of your clock.
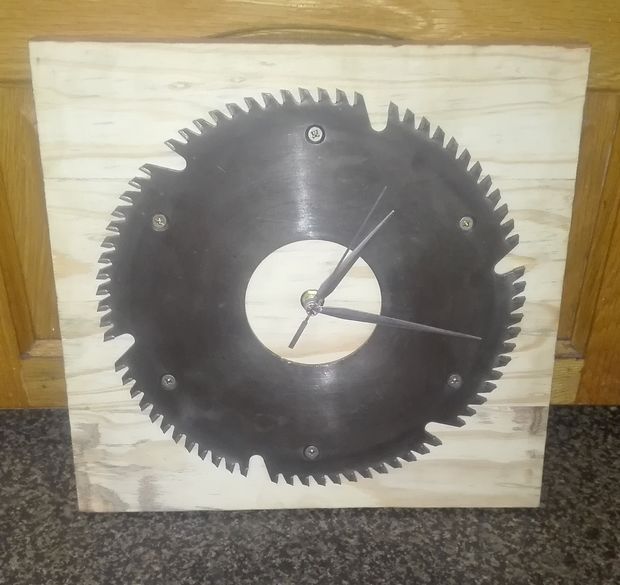
Finished!
This table saw clock was so simple and looks so good that you may buy another table saw just so you can make another one! Have you made this clock yet?
Let Us Know How It Turned Out!
Article & Photo Source: Instructables
Great survival tool????
DMT waste art