Air conditioners can seem like a complicated piece of machinery, but this project breaks it down into easy-to-follow steps. You’ll be thankful you made the effort this summer when you’re camping!
Parts:
- 5-gallon plastic bucket with lid
- 4” 90° PVC
- 12 VDC water pump (Model 66039, from Harbor Freight)
- High-Speed Computer Case Fan
- SPST Switches (I purchased two from Radio Shack – your choice on which type you want to use)
- Project Box, small (Radio Shack)
- 1” L Brackets
- #6 screws, #6 flat washers, #6 lock washers, #6 nuts
- Filter material (minimum 24” X 36”)
- Window screen, black plastic (minimum 24” X 76”)
- Tubing (diameter to fit pump)
- T- fitting (diameter to fit tubing)
- Goop glue
- 4” dryer vent hose
- Cigarette lighter plug (male end)
- Tools:
Drill motor
- 2 – 2 1/8” hole saw
- Yardstick
- Razor knife
- Phillips head screwdriver
- Marker
- 5/32,” 3/16,” 15/32,” and ½,” drill bits
- Wire cutters
- Soldering iron
- Rosin Core Solder
- Tape Measure
- Electrical Tape
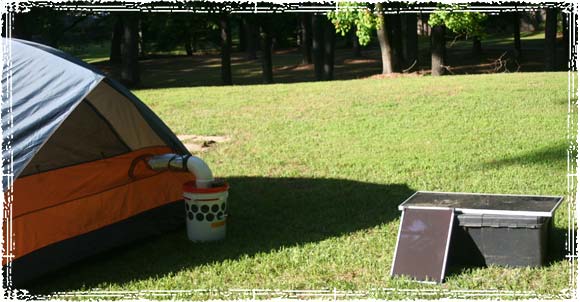
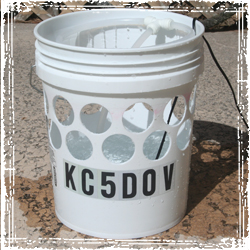
I began with a white 5-gallon bucket and lid from Home Depot. Two rows of 12 – 2 1/8” holes were drilled in the bucket. The holes are drilled around the top, leaving the bottom free for holding water.
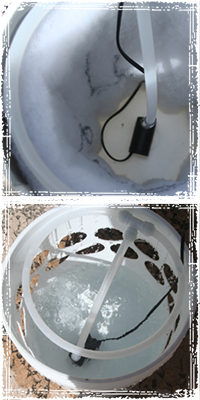
After drilling the 24 holes, a razor knife was used to de-bur the holes. A piece of window screen was cut to match the height and inside circumference of the bucket. The filter material was cut to the same dimensions. The pump was set in the bottom of the bucket and tubing cut to reach the top of the bucket.
At the top, a T-connector was installed and a loop of tubing was measured and connected to the T. In the circle of tubing connected to the T, 3/32’ holes were drilled through the underside approximately every ¾” – 1” for water to flow down the filter. The screen and filter were removed, and approximately 2 ½ gallons of water were poured into the bucket, and the pump tested.
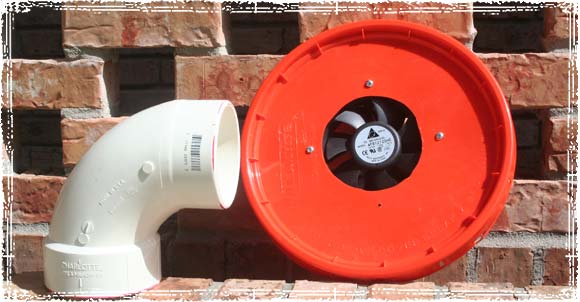
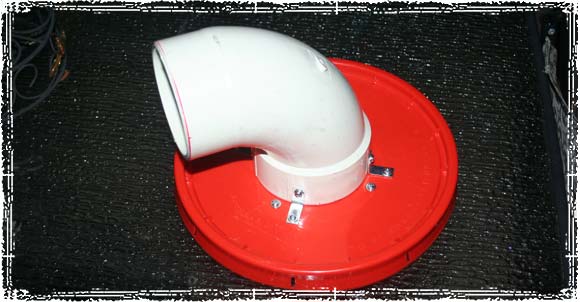
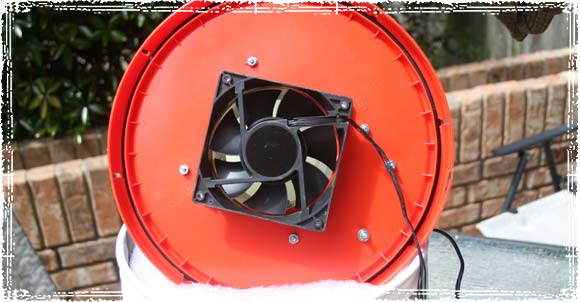
A hole, corresponding to inside diameter of the large end of the 90° PVC was cut into the lid. The fan was centered over the hole and connected to the lid with 4 – #6 screws, washers, and nuts. The 90° PVC was connected to the lid Using 4 – 1” L Brackets, screws, washers, lock washers, and nuts. A bead of GOOP put between the lid and PVC 90°, sealing it from any leakage of air. A dab of GOOP was also put on each screw and nut on the bottom of the lid to prevent them from loosening from the slight vibration of the pump and fan. On the lid of the plastic Project Box, two equally spaced and centered holes were drilled for the switches.
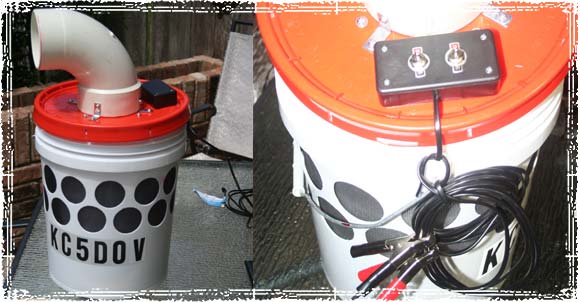
The switches were mounted to the top of the Project Box and then the Project Box was mounted to the lid behind the 90° PVC. A ½” hole was drilled through the box and lid. The pump and fan were wired to the switches with each connection being soldered. The power wires were connected to a longer wire with a fused cigarette lighter plug on the other end for use with our solar panels and deep cycle batteries.
To view the rest of the process, click here!
Have you been able to make your own air conditioner? Let us know if you have other tips!
Article and Photo Source: Off Grid Survival
Heather Scarbrough
Nate Moore