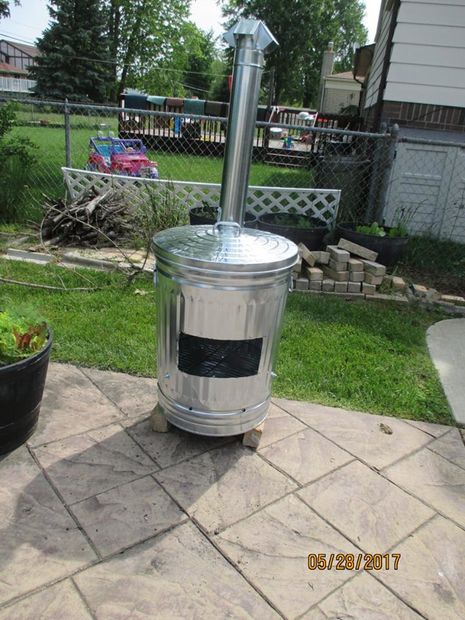
A fireplace is the epitome of fall and winter so as the seasons approach, you can use what's left of the summer to make this DIY chimenea. Not only will it look great in your backyard, but it'll be a conversation starter for any guests you have!
Step 1
- 1 metal can
- 1 – 24′ piece of 4″ stove pipe
- 3 – 1 inch sheet metal screws
- 1- connector end piece
- 1- 4′ cap
- 1 BBQ grate
- 3 bolts ( 3/4 inch – 3 inch long ) , 6 washers, 6 nuts
Step 2
Lay out connector and mark with sharpie
Step 3
Drill a bunch of 3/4 ” holes
Step 4
Use metal snipers
Step 5
Fasten end piece and install stove pipe
Step 6
Fasten Together. Use the 1 inch sheet metal screws
Step 7
Push the cap on, You don't need to screw it on. (makes it easier to clean)
Step 8
Mark Holes for the Bolts. Measure up about 8″ from the bottom, Mark 3 spots evenly spaced out
Step 9
Drill Bolt Holes. Use a 3/4 inch drill bit
Step 10
Take your bolts and install.
Step 11
Install BBQ Grate
Step 12
Lay out a couple of lines at 10″ to 16″
Step 13
Measure Out the Length. Make it about 14″ wide
Step 14
Drill a few holes in each corner and a few in the center
Step 15
USING GLOVES cut out the opening. THEN take a good metal rasp or grinder and knock the edges off.
Step 16
Drill Some Air Holes on the Side. About 4″ up from the bottom, drill about 8 – 3/4″ hole
Step 17
Drill a Few Air Holes on the Bottom. This will help with airflow and if any water gets in it will drain.


Have you made this chimenea? Would you recommend the project to others?
Article & Photo Source: Instructables
Except for the galvanize poisoning.
As long as it is not galvanized.
Andrea Mendoza Cárdenas
Allá lo hacen con los tambores grandes … 😉