Here's everything you need to know to make this DIY electric kiln. Start by gathering all of your materials, which you can find in the original post over at the Instructables website. Then begin building:
Step 1: Body of the Kiln
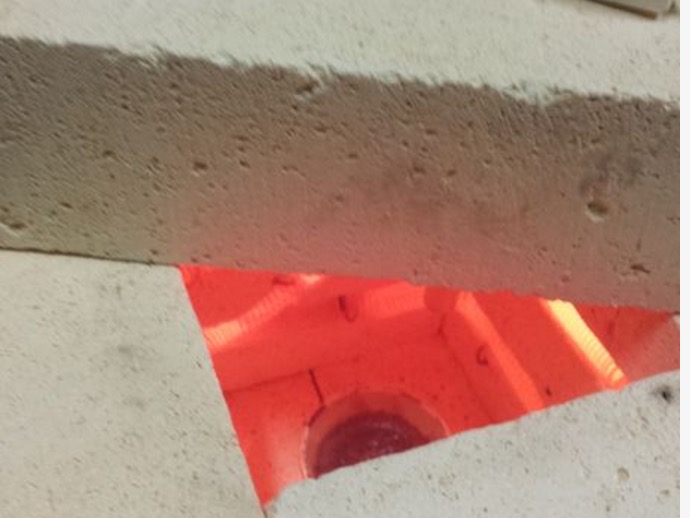
The kiln is not supported off the ground so the bottom should rest on a concrete floor or a non-flammable, heat resistant surface. Two of the bricks form the floor, and 3 for the sides. I cut one brick in half so I ended up with two squares that are 4 1/2″ inches in length. I used my router to make 3/8″ channels as in the pics. The channels for the element should be routed in the longer bricks too (the top and bottom channels in the longer bricks were 5 inches long). While routing these I had the room well ventilated and wore a dust mask. The soft bricks will throw off a lot of dust! After I made my element I found the element was a little too wide for my channels. I just took a small file and ground down the channels to fit. These are soft bricks so I didn't have to take very much off. I took the 2 pipe clamps and connected them end to end. This made one long pipe clamp. I filed down the corners of the fire brick where the clamp touches (pic.4 and 5) and connected the loose ends of the clamp around the kiln body. I needed to flatten down the clamp on the sides to make it reach all the way around. Once I got the ends to meet, I used my flat head screwdriver to tighten the clamps. My final kiln body looks like pic. 4.Step 2: Winding a Kiln Element (down and dirty)
This step is really very easy, fun and cheap! First l needed to build a small stand for my steel rod. I just used a 2×4 cut into 3 pieces like in the first pic. I mounted the stand to my workbench with some wood screws. I made the stand about 6 inches shorter than my steel rod and then drilled a hole that was a little bigger than my 1/4″ steel rod. I made the hole the same height as my drill because I needed to connect the chuck of the drill to the steel rod (pic 2). The Kanthal wire will pop off the spool like a spring as you uncoil it (just an fyi). I connected the free end to the steel rod with some duct tape. I left a tail of about 10 inches so I could make a terminal end when I was done. I slowly turned the rod with the drill while feeding the wire onto the rod. I like having it wind on top (pic.4). I also marked the steel rod with a sharpie to make sure I could get a coil to the length I want. In this case I made a coil that is 20 inches long. It was hard to keep a tight coil so didn't worry that my coil was not perfect. I was going to stretch it anyway! Once I had my coil, I just slid it off the rod and cut the other end leaving another tail with another 10 inches.Making my terminal ends (or pig tails) was easy. I folded the 10 inches in half and then put the loop end in my drill chuck and tightened it down. I held the other end of the wires with my pliers then slowly turned the drill to twist the wire (pic 5 and 6). I gently stretched the coils apart until my coil was about 32 inches. Voila! I made my own kiln element! I should have plenty of Kanthal left over to make several more coils. If you alter my design, just make your coil longer. It is important that the coils don't touch each other. This is where your element will burn out if the electricity arcs across the coil.
Next you'll install the heating element. To do this, cut the Kanthal into about eight or nine pieces measuring 1 inch each and then bend them into a U shape using pliers. Next, drill two holes an inch apart in one of the kiln's small bricks and through the channels. This is for the pig tails to come through. Put the pig tails through the holes and install the heating element and hold it in using the u-shaped pins.
Now install the electrical connections. To do this, cut the outlet end off the extension cord, and then strip the wires from the cord so that there's about 1/4-inch of bare copper wire. Attach the green ground wire to the clamp band, and then use use two nuts on each element wire and place the copper wire between two nuts.
And you're done! This DIY electric kiln is a lot easier to make than we expected it to be, and it's incredibly efficient and easy to use. Have you ever made a kiln? What was your experience like? Share your thoughts in the comment section below!
Article Source: Instructables
I really need a kiln! This tut is great
This is my design- the one pictured is actually a toploader. I do have a front loader design also on Instructables.
BD Ghys