So, if you're ready to try this nifty project for yourself, we have the instructions right here. Step 1 involves understanding how this air compressor works, and Step 2 is gathering all of your materials, a list you can find in the original post over at Instructables. Now you're ready to begin:
Step 3: Plumbing
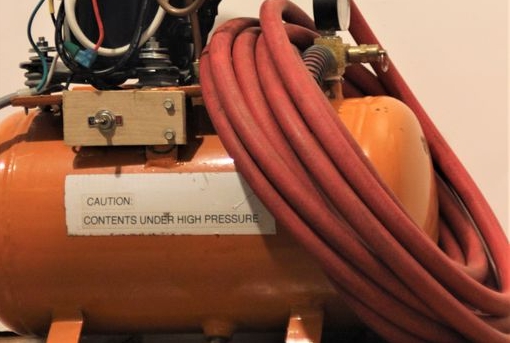
I chose to use pressure rated brass compression fittings to connect the pressure lines, which are copper tubes bent into a shape that allows for slight flex in the pump assembly. The intake tube of this pump has a foreline filter drier installed on it from the dehumidifier, this is helpful, as it will somewhat protect your pump from debris. You can also choose to install an intake muffler to make it even quieter, however this is largely unnecessary.On the output side, you will need a valve block with a relief valve and pressure gauge. A relief valve is essential, so if something happens and you leave the pump running, it won't over-pressurize and detonate. It is also preferable to install a cutoff switch, which cuts power to the pump when it reaches a certain pressure, this will allow you to leave the pump running, and it will stop pumping when it reaches final pressure and re-start automatically when you draw air from the tank. I chose not to have this as I almost exclusively use my compressor for blowing an air stream, rather than operating tools. The gauge is simply an AC recharge gauge, which tops out at 100 PSI.
Step 4: Electrical
The electrical is fairly simple, your compressor pump will almost universally have a overheat cutoff switch, and a start capacitor. These pumps need a capacitor to start under pressure otherwise you will just burn out the motor. be EXTREMELY careful around these capacitors, the contain large amounts of energy, and will hurt or possibly kill you. My system has a rubber boot that covers the capacitor terminals, make sure you have something like this or some form of insulation to protect you from bare wire.Step 5: Testing
Now that your compressor is a complete system, you need to seal and pressure test. For pressure testing put the compressor on an extension cord and let it run until the relief valve opens. You want to make sure your connections wont blow off under pressure, make sure to be far away or have something large between you and the compressor while testing. Make sure there are no leaks by spraying soapy water on any connection points where air might come out.When you have verified the safety and operation of your system, you can now enjoy the beautiful silence, and never listen to the deafening rattles of an inferior non-hermetic piston pumps again.
What do you think of this project? Would you make this DIY air compressor, or would you rather buy one? Share your thoughts in the comment section below!
Article Source: Instructables