Here are the instructions for these amazing LED safety glasses. First, gather all your materials, which are listed at the original post over at Instructables. Then, start assembling everything:
Step 2: Preping the LEDs
The first thing we're going to do is prep the LEDs. To start, take the dark heat shrink and cut it to about the size of the LED bulb. Then, put it on the LED and shrink it. Do the same if you have any other LEDs.Next, Hot glue the LED(s) together. Since I had 3 LEDs, I glued them in a triangle shape.
Finally, Solder the + leads and the – together.
Step 3: Soldering Everything Else
Now, cut the red wire of the battery pack in half, and solder the resistor in between the 2 pieces of red wire. Then solder the end of the red wire to the + leads of the LEDs. Next, cut the black wire in half and solder in the switch. This is where a Multimeter would come in handy. Take the switch and find the 2 points that are connected by the switch and solder the halves of the black wire to them. After that, solder the end of the black wire to the – leads of the LEDs.Also, make sure that if you use heat shrink to cover the solder joints, put the heat shrink on BEFORE you solder everything. I have done this many times (much to my embarrassment :P).
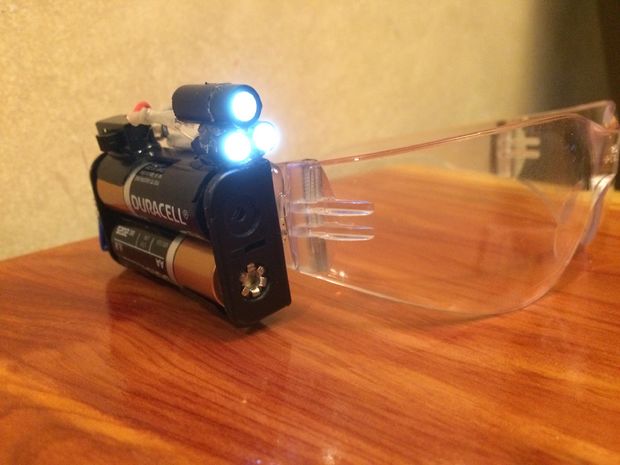
Now, just mount everything with hot glue and you're ready to go.
Wow! This is a really cool idea! We love how this takes something simple and tweaks it just a little to make something incredibly useful and clever. We can't wait to make this for ourselves!
Article Source: Instructables
Lame
I mean a headlamp doesn’t pull your glasses down.