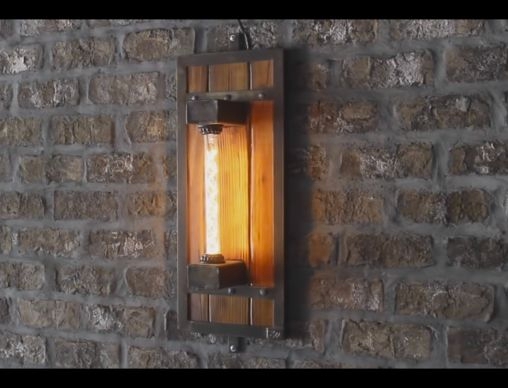
Here's everything you need to know to make these attractive and function wall sconces. These look really cool and are easy to make even if you're a DIY novice.
Step 1: Cutting the frame
The first step was to cut out the frame. The frame is made of 1″x1″x1/8″ angle iron.
I used a DeWalt cold saw for this. I truly believe this to be the most deafening tool one can own!Step 2: Welding the frame
With the pieces for the frame cut, the next step was to weld the frame together. I'm using a Lincoln 140C MIG welder.Step 3: De-burring the socket housings
After cutting out some 2×3 square tubing(Cold saw again), I'm de-burring the holes I drilled which will later accept the bulb.Step 4: Constructing the panel
The next step was to cut out the panel, which will set inside the frame. I'm cutting a piece of 2×12 Southern Yellow Pine.Step 5: Chamfering the edges
With the panels cut, I'm chamfering the edges so there will be a visible & rustic joint when the panels are glued together–without this the panel would resemble laminated plywood.Step 6: Fire!
I also torched the chamfer to heighten the contrast once the piece is assembled and stained.Step 7: Mock-up
With the panel glued up, and routed for the socket frame–this is the mockup assembly.I used a DeWalt plunge router on the panel to accept the socket frame
After this, you just need to stain the sconce and then wire up and install the sockets. Done!
We really like this DIY project because it's the kind of thing you can do in a day and see immediate results. Plus, it's a fun, practical (not to mention inexpensive!) way to give any room in your home a little flair. We know what we're doing this weekend!
Article & Photo Source: Instructables