In case you need some more convincing, there are several benefits to applying a wood finish. It will protect your wood from scratches, moisture, stains, and UV rays from the sun. For example, that wood coffee table that you built would be a prime candidate for a finish since it'll probably be used to hold drinks, belongings and will sit in sunlight for at least part of the day. A wood finish will also be aesthetically pleasing. Your project will look more expensive and complete as a result.
Preparing Wood for Finishing
No matter what type of finish you use, it’s important to sand your projects first. I usually start with a 120 grit sandpaper and then move up to a 220 grit paper and stop there.
After sanding, make sure you remove all the sawdust from your project. Dust particles are the bane of a good finish. I like to vacuum off the surfaces, then wipe them off with a tack cloth. Then, with a cleat lint-free cloth, like an old t-shirt, I wipe everything down with mineral spirits or paint thinner.
Two Broad Categories of Finish
Layered finish: one that sticks to the surface of the wood, kind of like paint does. This includes polyurethane, lacquer and other varnishes.
Oil finish: one that penetrates into the grain of the wood, such as linseed oil or tung oil. There are also mixtures of the two such as Danish oil, which is a usually mix of varnish and tung oil.
Oil Finishes
Oil finishes are kind of earthier: The wood looks great and more natural, but they don’t offer nearly as much protection.
Polyurethane
Polyurethane is probably the most popular finish today. The biggest drawback is that it can be very time consuming to apply. To get a good finish, you need to apply at least three coats, which realistically might take three days.
Applying any finish with a brush is different than painting. The goal is to avoid swiping back and forth and creating streaks or leaving behind air bubbles.
It’s a good idea to pour into and use finish out a separate container rather than straight out of the can.
Dip the brush into the finish, all the way up to the ferrule and let it soak up as much as it can. Lightly press the tip against the can to remove any excess that might drip. A good quality brush should hold quite a bit of finish.
Tap off just the excess that wants to drip. A good quality brush will hold a lot of material.
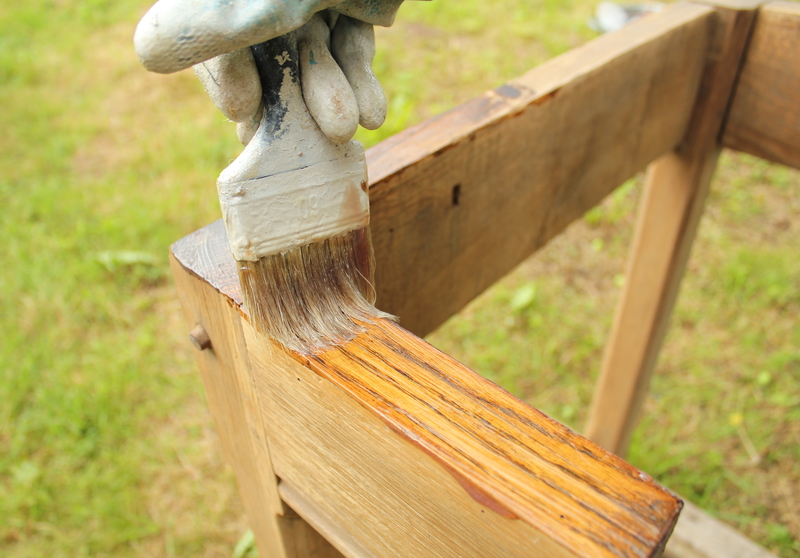
Start at one edge of the wood and try to apply the finish in one long stroke along the entire length of the board, pressing down more and more on the brush as you get to the end, letting it release the finish the entire way.
Applying a clear finish is different than painting. Use long strokes and don't sweep back and forth.
Fill the brush again and apply more, slightly overlapping the first stroke. Mostly, avoid brushing back and forth as if you were painting a fence. Use long, steady strokes, trying to let the finish flow as evenly as possible. Brush slowly and don’t stop to take a break until the entire surface is completely covered. If you miss a spot, skip it. Just leave it for the next coat. If you try to dab in a patch, it can look worse. Also, it’s a good idea to start with the edges and vertical surfaces then finish up with the top surface.
Overlap each stroke.
Check the back of the can to see how much time you need to let it dry between coats. Once each coat is dry, it should be lightly sanded with 320 grit sandpaper to remove any dust nibs and help smooth the surface.
Make sure you remove all the sanding dust before applying the next coat.
Pay extra special care applying the final coat to avoid brush marks, runs and streaks. Use a good brush.
Give the top coat extra careful attention to avoid drips or runs.
Types of Polyurethane
You can buy oil based or water based poly.
But the biggest difference between oil-based and water-based polyurethane is how they look on wood. I tend to prefer oil-based poly because it gives the wood a warmer, somewhat amber look that most people find very pleasing.
Finally, there is a third option called Wipe-on Poly, which is just regular polyurethane that the manufacturer has thinned down with mineral spirits.
Lacquer
Almost all wood furniture you might buy at a store is finished with lacquer. In industrial and professional production environments it is always sprayed on with an HVLP sprayer. Luckily there are two easier options available for hobbyists and weekend woodworkers.
Brushing Lacquer
The first is brushing lacquer. Apply it using the exact same brushing procedure I described for polyurethane. The only change in technique is to brush a little faster and definitely don’t brush back and forth.
The best part about lacquer is that you don’t need to sand between coats.
You’ll need lacquer thinner to clean your brushes. Between coats, I like to just wrap the brush in a paper towel or rag moistened with lacquer thinner and put it in a plastic bag.
I like to lightly sand the surface before applying the final coat. This will knock down any dust nibs or drips and make the top coat very smooth.
Spray Lacquer
Without question, lacquer from a spray can is my go-to finish. It’s easy to apply: Just spray it on in a back and forth motion, being careful not to get too close or too slow where it develops drips or runs. For small projects, spray lacquer is an absolutely fantastic finish.
After the lacquer has fully cured, say 24 hours or so, I like to smooth out the topcoat. To me, this is what separates a good finish from a great finish: one that is very tactile and feels smooth without dust nibs or other imperfections.
Lacquer Drawbacks
First, lacquer can be more expensive than other finishes. Especially the spray cans. Secondly, lacquer has an very strong odor and can be harmful to breathe. Use a respirator rated for Organic Vapors and solvent filtering. Lastly, some people complain about the look of lacquered finishes, saying they look too artificial.
Tung Oil vs. Linseed Oil
There are basically two types of oil finishes: tung oil and linseed oil.
If I’m using linseed oil, I like to let it dry a couple hours, then lightly sand the surface and apply a second coat.
Tung oil can take days. Use the same wipe on / wipe off procedure as linseed oil, but let it dry 24 hours before sanding it and applying the next coat. Usually you will need 4 or 5 coats. The benefit to tung oil is that it offers more water resistance than linseed oil.
Danish Oil
A third alternative that I consider an oil finish is Danish Oil. It’s actually a blend of polyurethane, and tung or linseed oil.
Apply it similar as tung or linseed oil, just wiping it on with a rag. Wait 30 minutes and wipe it off. In a couple hours, apply a second coat. If you want to put a layer of poly on top, wait a few days.
Do you have any experience with choosing and applying finishes to your woodworking projects?
Article Source: Woodworking For Mere Mortals