
First, let's make sure that we have all the materials that we need in order to complete this project. Here is what you will need.
Materials for Carving Knives:
• Old Hacksaw blades (Or reciprocating saw blades)
• 2 by 4 (Or any handle material)
• 2-Part Epoxy
Materials for Custom Box:
• Plywood (I used 1/8th inch furniture grade plywood)
• Crafting Felt
• Leather strips or scraps
• Needle and Thread
• Brass Paper Fastener
• Decor Paper
Tools Needed:
• Jigsaw Dremel with Metal Cutoff Wheel
• Bench Grinder
• Xacto (for felt and leather)
Directions:
Step 1: Designing The Blades
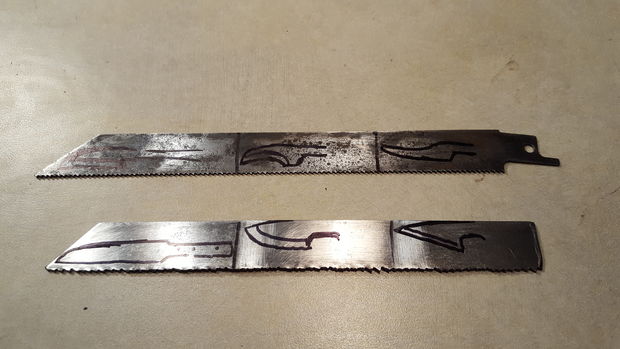
The first step for me was cleaning off the rust and paint from the old reciprocating saw blades, using a wire wheel on my bench grinder. This can also be done in a matter of minutes with just sandpaper because the blades are not very large.
The next step for me was researching which types of blades there are for carving, and then sketching out my designs onto the steel. I wanted to get a wide range of different carving knives, useful for different things, so I had a large variety of blades.
*Make sure that you account for the length needed for the tang. In this project, we left about an inch.
Step 2: Grinding The Blades
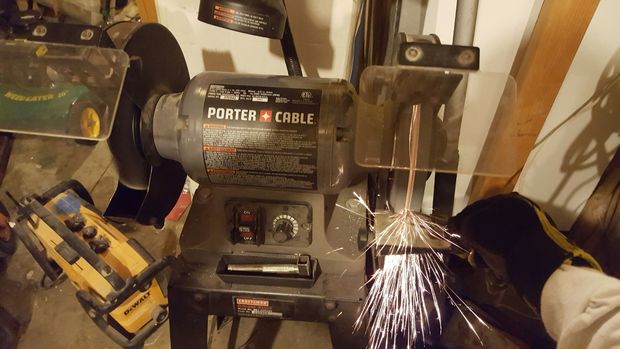
I used a cut off disk on my Dremel to cut out each individual carving blade, then took them to the bench grinder and slowly and carefully ground them down to the outlines. I was very careful not to overheat them causing them to whatever heat treatment they had from the manufacturer because I didn’t want to have very brittle blades or very soft blades that can’t keep and edge.
*This step can also be done with hard files.
Step 3: Making the Handles
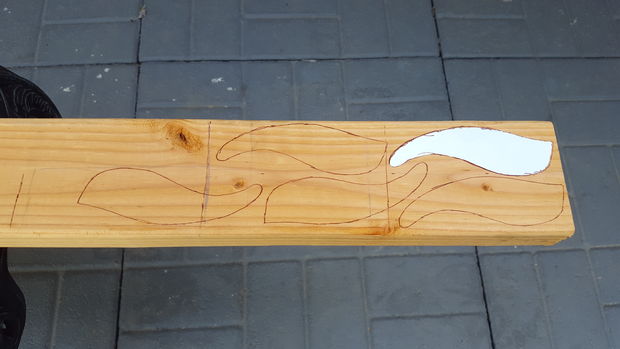
For the handle material, I used a pine 2 by 4 and traced out the rough outline of my handle contour onto the wood. Try to find straight grain with no imperfections such as knots, but it is really only for aesthetics because there won’t be too much pressure on this knife, and comfort is generally more important.
I used my jigsaw to cut out the rough handles, and then used my jigsaw again to cut them in half so I could insert the blades. This step can also be done with a coping saw or any other handsaws you may have, it will just take longer.
I traced the tang of the knife onto one side where I wanted it onto the wood. I then carved out the space where the blade would go with an Xacto, and made sure that the blade sat flush in the one side so that the handle could be glued together seamlessly. I then used 2 part epoxy to glue the blade in the handle, and to glue the two sides of the handle together.
Step 4: Shaping the Handles
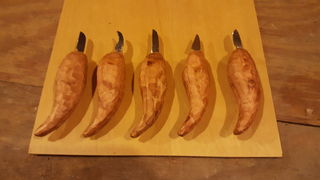
The next step was shaping the handles with a bench grinder. This can also be done with a belt sander, files and rasps, or just sandpaper if you’re patient. I used the bench grinder to achieve a faceted look on the handles, which also make it very comfortable to hold and give good grip.
Once you are done sanding, you can also drill through the blade and the handle to pin the blade in and make sure it doesn’t come out, but that is only if you are afraid the tang might not hold well enough.
Step 5: Making a Box
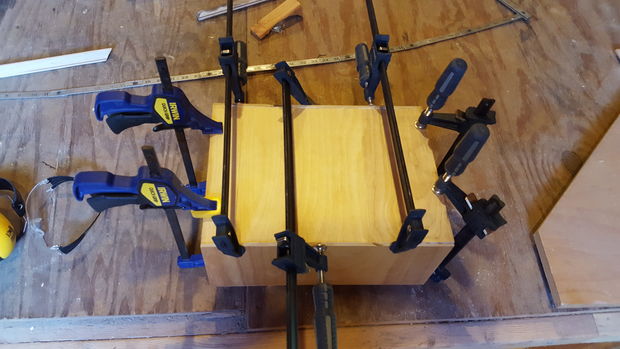
I created the base of the box using all scraps. I used 1/8 inch veneered plywood as the main box base, and glued all sides of the box together so that it created a completely sealed box. I then took it over to my table saw and set the fence about an inch and a half away from the blade, and cut all 4 sides of the box like that. This allowed me to have a box of perfect dimensions, which fit together perfectly. I then sanded a poly coat off of the plywood, and prepared the base of the box for the trim.
Step 6: Lining the Box and Adding Details
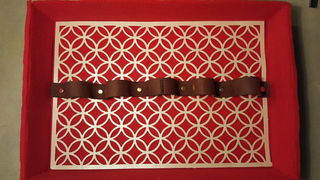
Line the inside of the box with the felt color of your choice. for this project, we used red which helps the craftsmanship of the carving knives really stand out. I also added a custom piece of decorative paper, which I spray painted black. This is where you can get creative as well and cut out any design that you would like. If you are making this as a gift doing a custom cut as a backdrop would be a fantastic touch.
Step 7: Leather Working and Brass Hardware
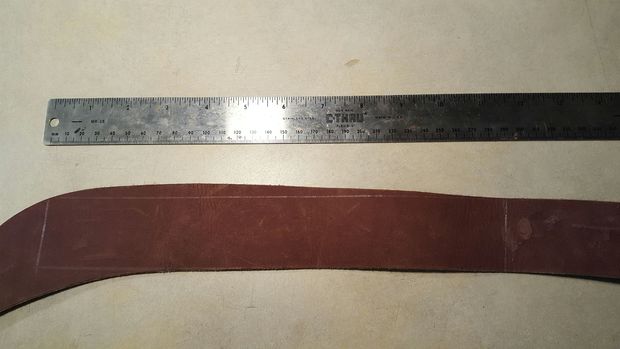
Now you will need to take two scraps of leather and sketch out a template for how you are going to hold the blades in the box.
I found the perfect sized piece of leather to cut 2 equal width strips from and cut that out using an Xacto.
Then you will need to join the 2 ends and stitch them together. and put that stitch in the middle of the box as an added detail. I took a thin nail, and punched holes in each of the pieces of leather, making sure they lined up, then quadrupled-up regular thread, and started sewing it together. There are special tools which are built for leather working made to do all of these jobs, but I don’t have any of them, so I just tried to be resourceful and use what I did have. After the pieces were stitched together, I then
Take a think nail and punch holes in each piece of leather lining them up perfectly. Then you will want to quadruple up your regular thread and sew them together.
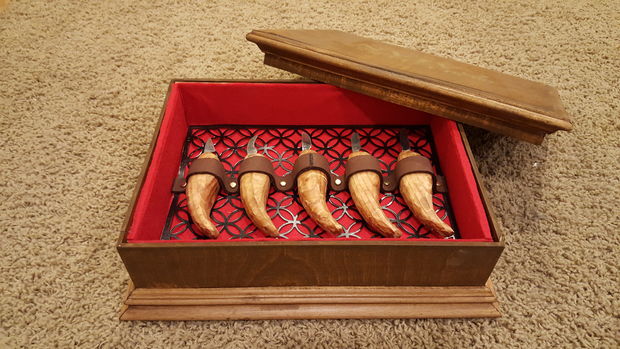
Then lay out all of the carving knives for spacing and fasten the leather to the felt by slitting a hole in both layers, inserting in brass paper fasteners and fold them beneath the felt. Now you will glue them to the wood.
Now you have the perfect set of carving knives and a great box to put them in. You also have an amazing gift for the DIY'er in your life! So let us know what you think of this project and if you have any helpful tips or tricks that you thought of that would make this project better.
Source: Modern Rustic Workshop
I was just thinking about this the other day. I’m cheap and refuse to pay, at least, $50 on just one. Lol