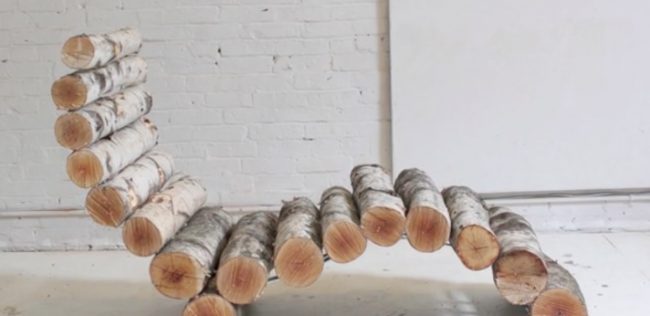
Below is a step-by-step guide as well as a video to direct you in making this lounger. The curved shape makes it more comfortable to sit on than a traditional lounger and gives it a slightly modern touch. You could also buy an inexpensive cushion to place over it. The logs will look much better as a lounger sitting on your outside patio than they will in a landfill or fireplace. If you're extra handy or have some help, you might be able to make a pair of them in one day!
SUPPLIES:
- HomeMade ModernLogs 3″ – 6″ in diameter: I got these birch logs from a landscaping company that had been hired to clear a piece of land.
- HomeMade ModernLag Screws 6” and 9”
- HomeMade ModernBrackets and Deck Screws
TOOLS:
- HomeMade ModernRYOBI 18 Volt Chainsaw
- HomeMade ModernRYOBI 18 Volt Cordless Drill
- HomeMade Modern1 ¼” Drill Bit
- HomeMade ModernExtra long ¼” Bit
- Optional: HomeMade ModernRYOBI 18 Volt Impact Driver
INSTRUCTIONS:
STEP 1: Cut logs
I cut the logs into 18” long segments. Feel free to cut longer segments if you have enough material to work with.
STEP 2: Layout the design
I used blue painter's tape to mark an outline of the design on the floor. If you'd like a PDF of the template I used, feel free to email me. Do a test layout with your cut logs.
STEP 3: Drill holes
Use the 1 ¼” bit to drill large holes about 1-2 inches into the log. These holes allow you to use shorter lag screws. You'll want the holes to be deep enough to allow the screws to go into the second log at least 2.5 inches. Use the long ¼” bit to drill pilot holes through the first log only.
STEP 4: Screw the logs together
Use a socket wrench or an impact driver to drive the lag screws and connect the logs. Use 3-4 lag screws for each log.
STEP 5: Flip it over and test
Flip the lounge upright and see where it wobbles. You can also do a little bit of shaping at this point.
STEP 6: Brace it with brackets
Use steel brackets and deck screws on the back side of the lounge to strengthen and stiffen the weak and wobbly parts.
Have you tried making this log lounger? Let us know if you've come across any other DIY ideas to transform tree logs!
Article Source: Homemade Modern