Woodworking can be a lot of fun if you have the right tools and know how. This project in particular was great because I needed more shelf space but didn't want something that was overly big and took up a lot of space.
Step 1: Materials
- The requirements to make this project are as follows:
- 1x sheet of 13mm plywood
- CNC Machine (bed size of 2×1 meter)
- Wood Glue (we used Elmer's)
- Sanding Papers (200 & 400 grits work wonderfully)
- 7mm Square Endmill
- Cleaning Cloth
- Wood Varnish
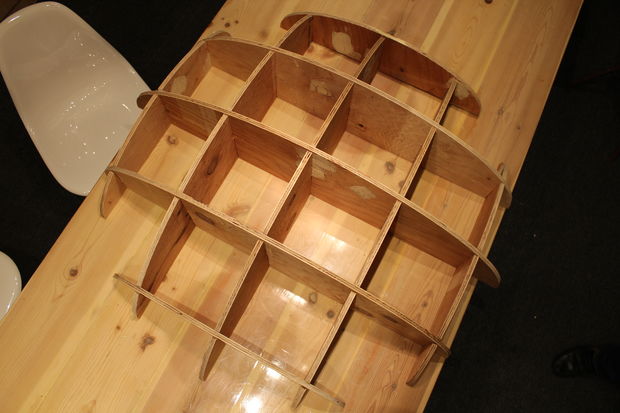
Step 2: Design
We designed as a simple half sphere although if this does not fit your particular style you can always modify this project to make it according to your desires.
Step 3: Cutting & Finishing
- Just load the design (.crv) and cut the design. This is for VCarve software
- If you wish to use another program then you can use either .svg or .pdf files.
- After cutting the design, sand the pieces especially the edges.
- Start with 200 grit and if you wish to make the finish even better, you can use 400 grit.
- Clean the pieces with a damp cloth and let them dry out.
- Apply your preferred coating of varnish. Typically, you'll want to coat your shelves with at least two layers of coating to preserve the wood.
Now with this project, I followed exactly as the original instructions specified and it came out great. If you would like more information or step by step picture instruction please see the wonderful people over at Instructables for more information.
Pages: 1 2