Another bonus of this key safe is for those who spend a lot of time in or near water outdoors: It prevents anything metal, including those keys, from getting rusted. You can even fit other valuables, such as jewelry, in the safe!
https://www.youtube.com/watch?v=kuE4TW2ietk
Step 1: Bits + Pieces
- An old steel bike frame, large enough for the key to fit inside.
- A long shackle combination lock
- Vinyl adhesive paper for stencils
- Spray paint
- Clear metal lacquer
- Welding wire or rivets
Tools –
- Angle grinder and cutting + grinding discs
- Hacksaw
- Metal files
- Hammer
- Drill
- Metal countersink
- Welder or pop riveter
Step 2: Clean Up the End
Cut the frame to make sure that the key can fit easily inside…
…and grind off the paint to the end
Step 3: Flatten
Hammer the end flat, leaving the corners open.
Step 4: Cut to Length
Work out the length that you need, allowing for a key fob if you have one.
Step 5: Weld
Weld the flattened end to stop the metal being prised apart.
Remember to leave the ends open.
Step 6: Clean Up
Clean up all of the outside of the frame section.
Step 7: Final Cut to Length
Make a nice end cut allowing for the key and the hole to be drilled for the padlock…
…clean the cut end with metal files.
Step 8: Drill a Hole
Drill a hole slightly larger than the padlock shackle through both sides of the open end.
Check before drilling that the key will not bypass the padlock shackle.
Step 9: Stencil + Paint
Cut out some cool graphic stencils
…and spray.
Step 10: Final Coat
I added a clear lacquer coat to the key safe.
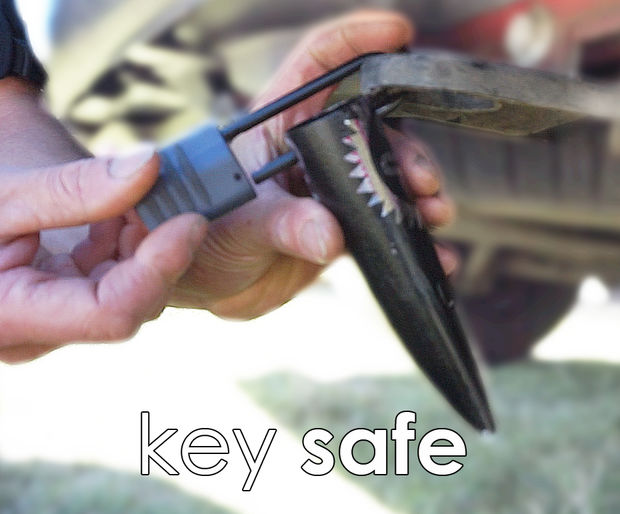
Step 11: All Ready to Use
Pop in the key, padlock to the underside of the vehicle.


Have you made this vehicle key safe? Would you suggest the project to others?
Article & Photo Source: Instructables