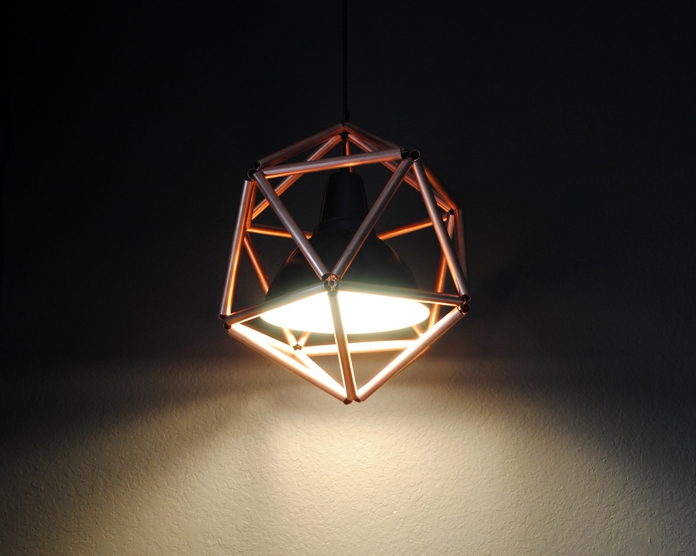
We all want our homes to look their best. This means that we want items in them that are truly amazing. This copper pipe iscoashedron light fixture will definitely take your style up a notch. You will be stunned by the results!
Let's Get Started!
The Supplies You Need To Gather Are:
$15 10″ Ikea Foto pendant light
$20: two pieces of 10’ 1/2” copper pipe
$10: two packages of 25’ copper wire
1 Math.
I began by tracing base of light fixture. I knew that I needed to fit the circle inside a pentagon, we divided circle into 5 sections with protractor (72 degrees/section). Bryan helped me figure out that 7.5” sides for the pentagon was a close enough number while giving me an easy length to cut. In retrospect, once assembled, the entire icosahedron came out a little large, I probably could have shaved the sides down to 7.25”
2 Spray paint.
The 10” Foto lights from Ikea come in silver, green, red and beige, but I wanted/needed black, so I taped around wire, did few coats of glossy black spray paint*.
3 Cut pipe.
An icosahedron has 30 equilateral edges, so I needed to cut my copper pipe into thirty 7.5” pieces. A 10’ pipe will give you sixteen 7.5” pieces which is why I needed to purchase two 10’ pieces. If a 10’ pipe is too long for you to safely transport home, you could always cut pipes in half at 5’ mark before loading them into your vehicle.
I made dots at t 7.5” mark all around diameter of the pipe with sharpie.
I lined blade in pipe cutter up with marks, tightened it, laid it on its back on a flat surface.
I found it easiest to rotate the pipe against the cutter, rather than vice versa. After you turn pipe to score it, tighten wheel on top of cutter, blade scores a little deeper into the pipe, few turns later, two pieces separate. Pro-tip: wear gloves.
4 Clean pipe.
Once all 30 pieces were cut, I used some very fine 0000 grade steel wool to remove the red ink markings from the copper pipe.
5 Assembly.
I began with three copper pieces and as long a piece of copper wire as I could manage.
After I made one complete equilateral triangle, I kept adding triangles using one of the existing pieces as a side. I just kept in mind that each “point” of the icosahedron had five edges running into it, and the shape really did build itself.
When I ran short on wire, I twisted it off at an edge of one of pipes, attached a new piece, tucking edges inside pipe. 50’ of copper wire was just enough for me to complete the icosahedron.
Before closing up icosahedron entirely, I made sure to fit my light fixture inside. You will want to run wire for light fixture through center of one of points of icosahedron, close it up around it.
6 Hang it.
I mounted a plant hanging bracket on the wall up by the ceiling. My initial plan was to hang light fixture with its own cord by looping it over t bracket, however I ended up using a piece of black rope to remove strain from the cord. This allowed me to position lamp within icosahedron exactly where I wanted it.
It’s perfectly easy to reach through the copper pieces to screw/unscrew a light bulb.
Finished!
This Copper Pipe Icosahedron Light Fixture looks so incredible that you might one to make more than one! Have you made this light fixture before?
Let Us Know What You Thought!
To learn more about how to make this light fixture, you can visit:
