
First things first and that is getting the materials that you will need. Now if you do not have these laying around your home or work shed then a quick trip to Harbour Freight or Lowes should do the trick.
Step 1: Tool and Materials
Tools
- Hacksaw (I used a metal cutting bandsaw)
- Drill and bits
- Welder
Materials
- Casters
- 1/4″ allthread coupler nuts
- 1.25″ square tubing
- 1 x 2″ rectangle tubing
- 1/4 x 2″ bolt or cap screw
Now I was lucky enough to somehow find all of this stuff with the help of a friend as he let me raid his workshop as well. But now that we have all of it what do we do with it?
Step 2: Make Carrier Bodies
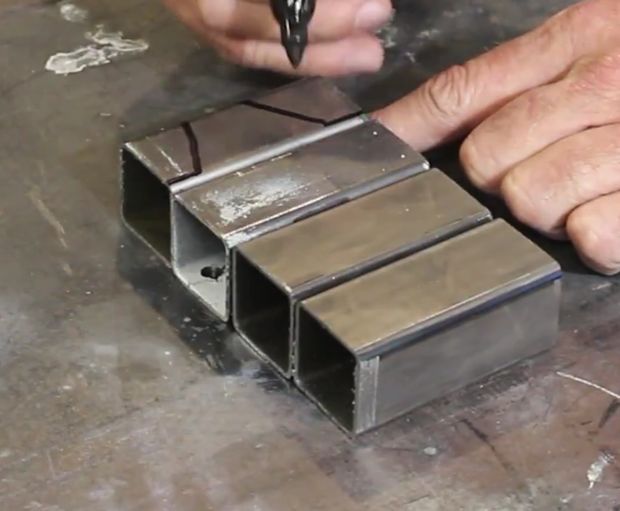
Cut square tubing to make carrier bodies to hold the casters and the locking levers. Whereas most casters are top-mount, these will be side-mount. There will be four mounting holes in the side to bolt this carrier to the equipment. There will also be two pivot holes. One for the caster and one for the locking lever. The critical element is that the caster pivot be close to the equipment, and the lever pivot be farther away.
Seems like a cool DIY project, but I think my definition of simple differs then this guy’s definition. The kit he talks about is about $80 for a 4 pack.