Electricity is one of the most vulnerable resources when SHTF so knowing how to handle a power outage is a handy skill. This hand-powered charger is built to give you electricity when you need it most. While it's on a small scale, (think cell phone size small) it can still be considered a 5v DC power source.
Below are the materials and step by step instructions with links to each of the items needed, inserted into the text so you don't have to go searching the internet for hours trying to find what you need.
Base and Handle:
Take a spare CD, preferably one you have no use for and using a blade of some sort make a small cut on the upper level only. This will remove the label enough that you can then take some sticky tape and place it over the tear and pull. This will remove the label from the CD.
You will want to keep repeating until the label is completely removed from the CD
Now take two plastic bottle caps and using hot glue paste a cap on the center of the cd. Flip the cd and pace the cap on the outer boundary.
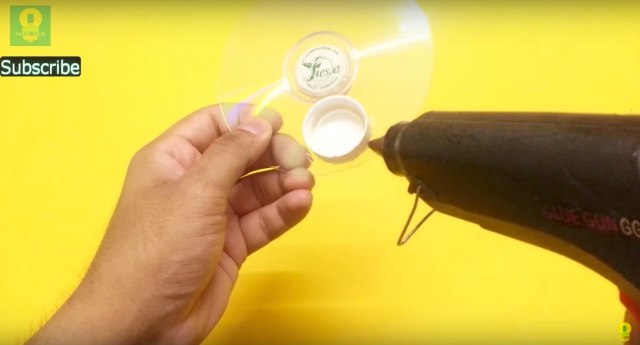
Mark the center point of both caps and carefully drill a hole at the marked points.
Take a 12v geared dc motor and fix the cd in the motor shaft. and fill hot glue into the bottle cap completely covering it and allow to dry.
Take a wooden stick about 15cm in length and insert the stick in the other hole and secure it using hot glue. Insert the straw over the wooden stick. This will act as the handle for the motor shaft.
USB Charging Circut.
Take a small piece of general purpose PCB board and a 7580 voltage regulator ic
Insert and solder the IC onto the PCB. Then take a 1000 and a 100 uF capacitor the refer to the schematic and pin configuration of 7805 IC below.
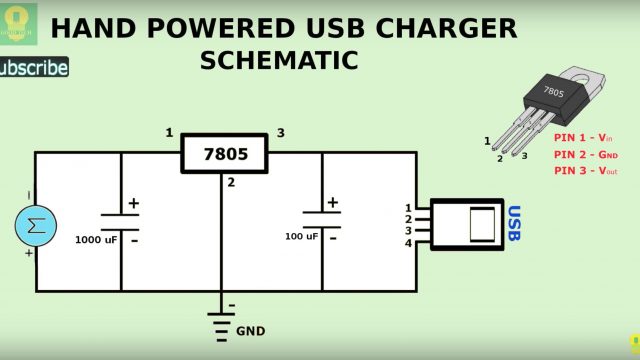
Insert and solder the 1000 uF capacitor to the input pin of the 7805. Do the similar thing to the output pin of the 7805 IC with the 100 uF capacitor then make all the ground connections.
Take a female USB port (refer to the configuration of the Female USB port below We only need pin 1 and pin 4)
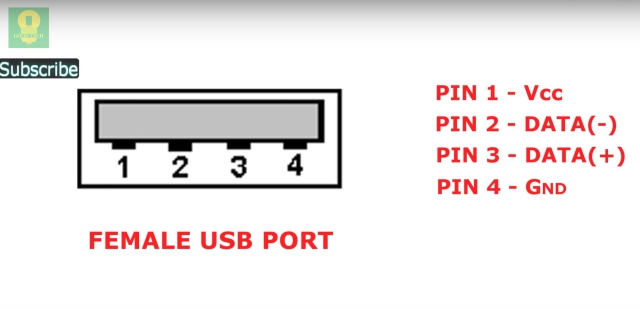
Insert and solder the USB port to the PCB (refer to the top schematic and connect the USB port to the output of the 7805 IC now cut the PCB to size. Take the motor we made prior and connect the wires as input to charging circuit. (refer to the schematic above. ) Using hot glue paste the circuit over the motor.
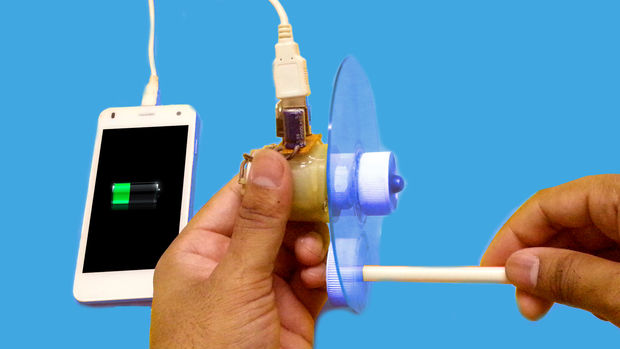
Now it's ready for use.Rotate the handle at a uniform speed and you should see the phone begin to charge.
Insert the USB portion of the charger into the female USB port and rotate the handle at a uniform speed and you should see the phone begin to charge.
Have you been able to create your own hand-powered USB charger?
Article and Photo Source: Instructables