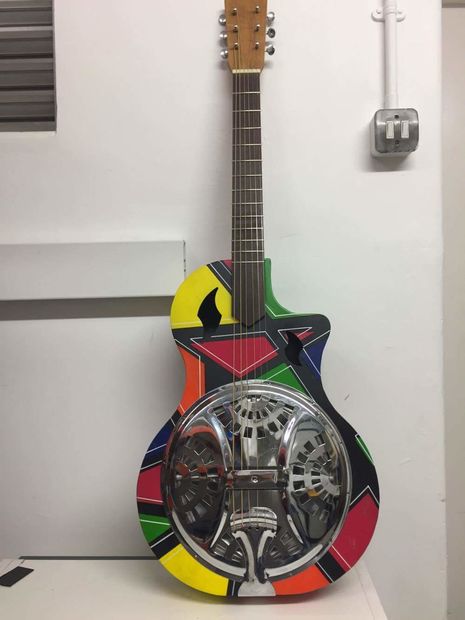
This guitar takes some time to design and assemble, but it will be well worth the effort. You'll be able to make affordable changes and customizations that you wouldn't be able to make at your typical guitar shop. You might even be able to sell them!
Step 1: Research and Design Decisions
The body of the guitar can be made out of a range of materials but in our project we chose to make a Steel Body Resonator Guitar with a Spider Cone and a Round Neck.
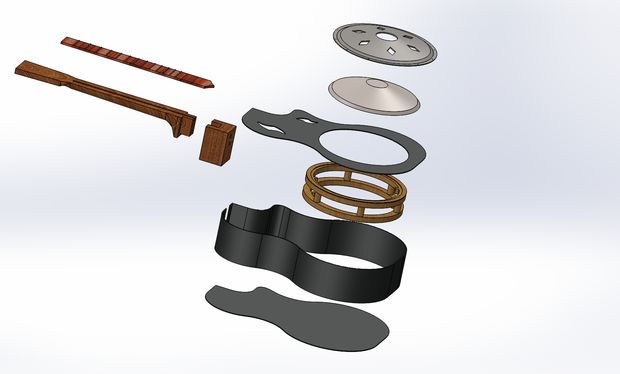
Step 2: Computer Aided Design (CAD)
The team designed each part of the guitar to obtain manufacturing drawings for the workshop.
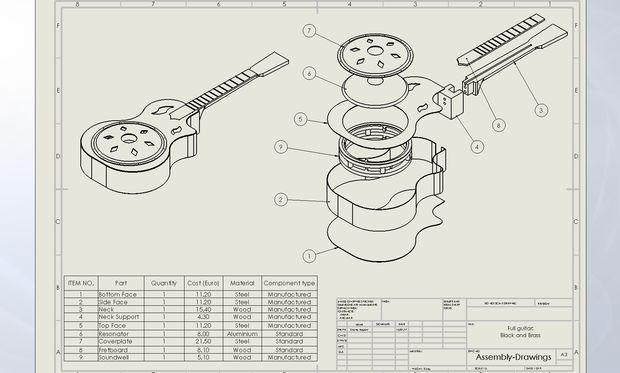
Step 3: Manufacturing Drawings
These drawings feature top, front and end views with some isometric views for good measure.
Step 4: Make or Buy
Once the drawings were established we knew exactly what and how much raw materials we needed.
Parts to be manufactured were, the body, the neck/head, resonator support and neck support.
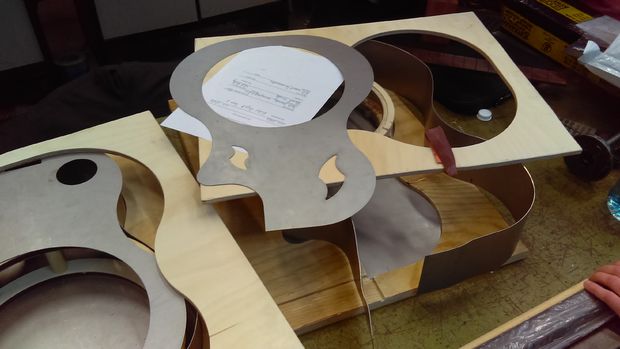
Step 5: CNC
The parts of the body were cut from steel using a CNC machine using the drawings and CAD files for measurement.
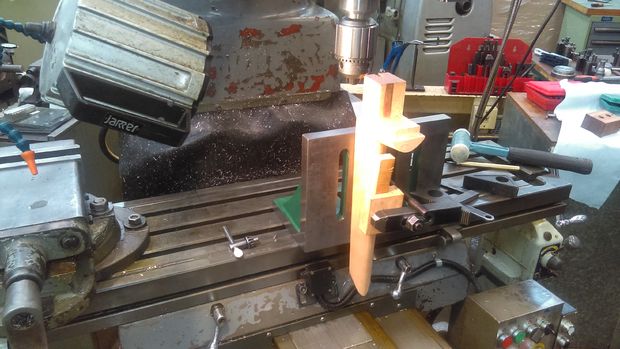
Step 6: Milling
The neck, resonator support, and neck support were then milled from wood blocks using the milling machine.
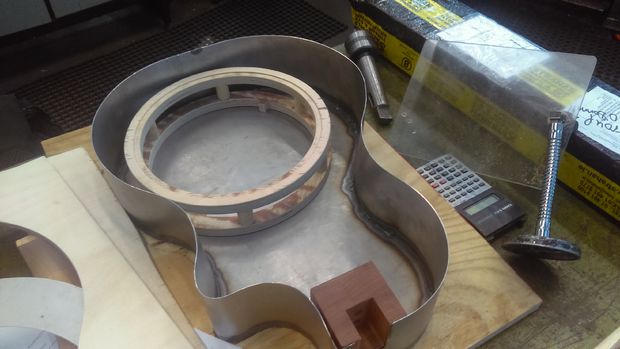
Step 7: Welding
The bottom and sides of the the body were welded together first using a tig welder.
The neck support and resonator support were then placed inside the open body and fixed to the correct position.
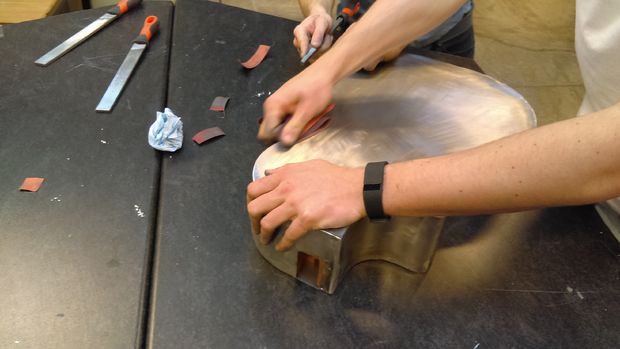
Step 8: Welding (2)
The body required more attention to the surface finish which called for rough sanding.
Once this was done the resonator cone was placed inside.
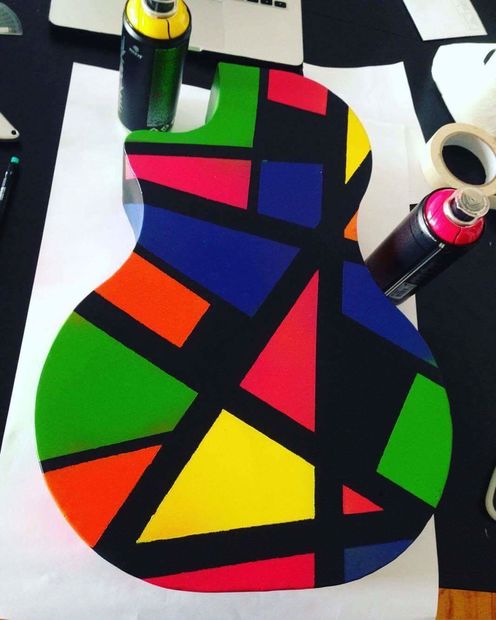
Step 9: Priming and Painting
Step 10: Finishing the Neck
The neck also had to be sanded.
We used a drill for tuning key holes in the head of the neck.
Step 11: Some Assembly
Once the body was together we attached the neck to the neck support along with the truss rod, and fixed it in place.
The fretboard was then glued on top along with the nut.
Step 12: Fretting
We bought a length of fretting wire and cut it to fit the slots we had already made on the fretboard.
Step 13: The Tailpiece
A hole was drilled in the bottom of the guitar to attach the tailpiece which was then secured using a nut and bolt.
Step 14: The Bridge, the Cover-plate and the Strings
We made notches on the saddle of the bridge for the strings.
Then we glued the cover-plate on and strung the guitar.
https://www.youtube.com/watch?time_continue=78&v=eqY9HtuVqkY

Have you made a steel body resonator guitar? How does it sound?
Article and Photo Source: Instructables