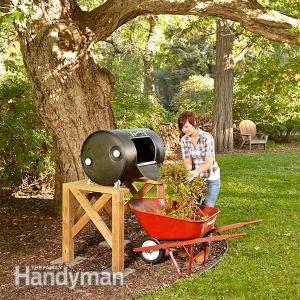
For as many advantages as it provides, this compost tumbler won't ask for much in return: one day, a moderate amount of work and as little as $100. It can benefit any type of home, but particularly if you live off-the-grid or on a homestead. That compost has multiple uses and you'll soon recognize that you couldn't live without it!
First, let's look at what we will need. Some of this you may have around the workshop, if not, it can be found ant any local hardware store!
Tools & Materials
- Clamps
- Miter saw
- Cordless drill
- 4-in-1 screwdriver
- Drill bit set
- Jigsaw
- Pocket hole jig
- Safety glasses
- Rivet gun
- 12′ 4×4 treated lumber
- 8′ 2×4 treated lumber (3)
- 10′ 2×8 treated lumber
- 6′ of 4″ PVC pipe
- Rivets (aluminum)
- Nuts and bolts (stainless steel)
- Hinges
- Handles
- 1″ flat aluminum stock
- Latches
- Exterior screws
- 3″ casters
Finding and customizing the drum
Clamp aluminum strips in place so 1/2 in. extends into the door opening. Fasten the strips with rivets or nuts and screws.
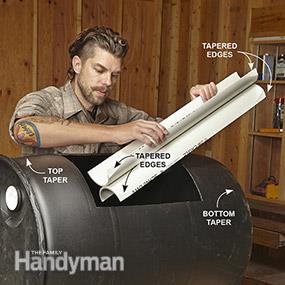
Taper the ends of the paddle to match the tapered ends of the drum. Sand the paddle with a belt sander until it fits. Then install the paddle with screws.
Ask for free used 55-gallon polyethylene drums at car washes and food processing and industrial manufacturers.
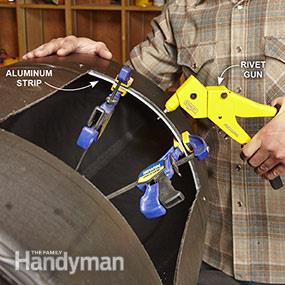
Next, use a jigsaw to cut a door panel slightly smaller than the width of your wheelbarrow. Bend 1/8-in. x 1-in. flat aluminum stock around the drum to form side reinforcements for the door opening. Cut the bent aluminum slightly longer than the door opening and mount it to the drum.
Then cut flat aluminum pieces for the top and bottom of the door opening and the hinge side of the door. Mount the top and bottom door opening reinforcements in the same manner. Mount the hinges at the bottom of the door opening so the door hangs down when you empty the drum. Finish the door by adding the latches.
To make stirring paddles, cut an 8-ft. piece of 4-in. PVC pipe in half lengthwise using a jigsaw. Cut the halves to length so they're slightly shorter than the inside height of the drum. Arrange two halves back-to-back. Then drill and screw the pieces together to form one paddle unit.
Since the drum has a taper at the top and bottom, you'll have to sand the ends of the paddles to match. Mount the paddle units 180 degrees apart and secure them to the drum with screws, nuts and washers.
A tight-head drum comes with two threaded “bungholes.” Remove the threaded caps to provide ventilation.
So how does it work? Keep reading to find out more!