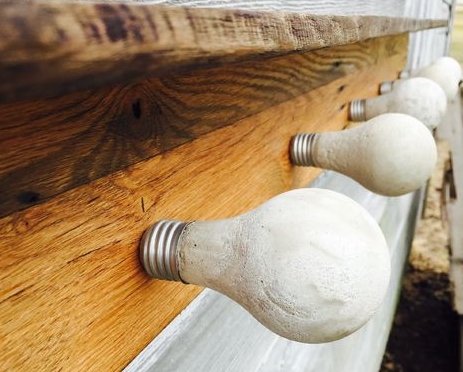
Because this project reuses materials, it's inexpensive and easy to follow. You don't need to learn how to operate fancy equipment. This coat rack is ideal for anyone who likes some extra organization, but doesn't want to spend a ton at The Container Store or Bed, Bath and Beyond. It's also a rustic touch to any entrance in your home so your guests will be impressed by your creativity!
Step 1: What You Need
- Burnt out light bulbs
- Needle nose pliers
- Small pick
- Concrete
- Lag screw
- Miter saw
- Drill
- Brad nailer
- Polyurethane
Step 2: The Light Bulb
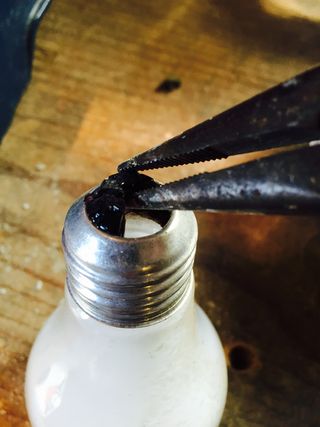
To dismantle your light bulb start by holding it upside down and use a pair of needle nose pliers to peel back the small metal piece on the bottom. Next insert your small pick in to the opening and start to break the black glass insulator.
Use your pick to break apart the interior element and then ream out the hole.
Make sure that all of the pieces are out of the bulb.
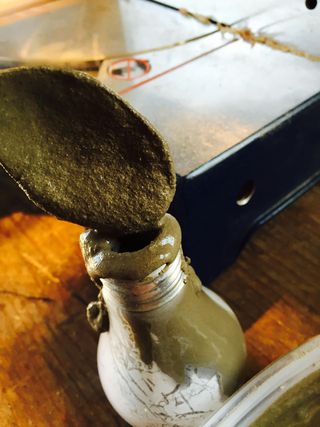
Step 3: Concrete
You want the concrete to be the right consistently depending on how you want your bulbs to look.
It seems that the dryer the concrete. The shinier the finish. I tried with all different mixtures and they all have pros and cons. Try a few for yourself and see which ones you like.