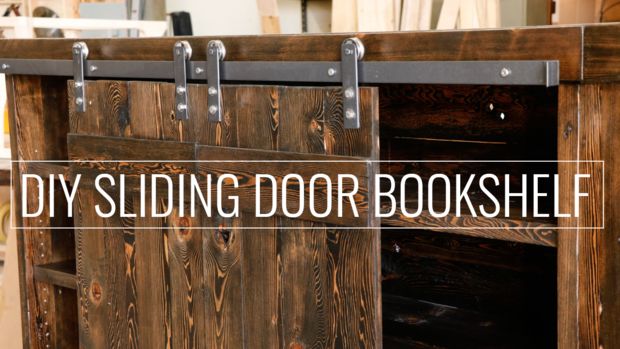
Yet another plus to this bookshelf is that it doesn't use a welder. So, you won't need to buy one nor learn how to use one if you're not familiar with it. Instead, it just takes a few tools and some good, old-fashioned elbow grease! Take a look:
https://www.youtube.com/watch?v=DH1TQJVieLY
You can purchase a full plan HERE!
- Table Saw
- Tape Measure
- Impact Driver
- Drill
- Mitre Saw
- Jointer
- Graco Finish Pro HVLP
- Endurovar Finish
- 23g Pin Nailer
- Japanese Cut Off Saw
- Angle Grinder
Step 1: Breakdown Material/ Mill Stock
Pull all of the nails if you're using reclaimed lumber.
Step 2: Glue Up Parts
Once all of your rough cuts are square, glue up your panels. Start with the top, bottom, and two sides along with the back support.
Step 3: Joinery
Mark and layout all of your joinery for the carcass assembly. Cut using the technique of your choice.
Step 4: Back Panels


Step 5: Door & Shelf Assembly
Rough cut door and shelf materials from the cut list. Assemble using glue and clamps for the shelves. Brad nails for the doors.


To view the remaining 3 steps, click here!
Have you made this sliding door bookshelf? Let us know how it turned out in the comments below!
Article & Photo Source: Instructables
Nice, but where do you get the slider hardware?