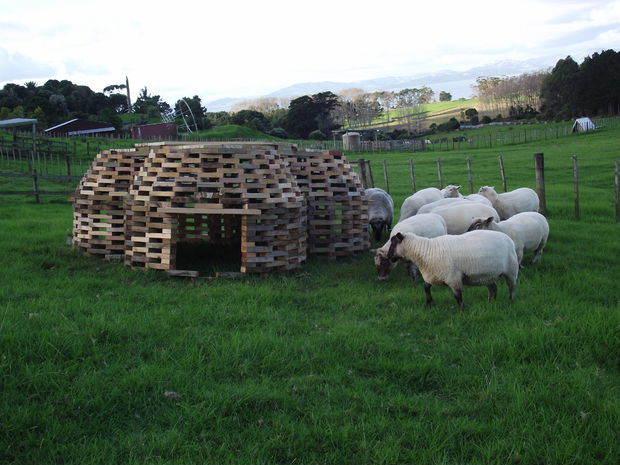
Instead of purchasing more expensive shelters for your animals, this DIY project will speak to both your creative and woodworking sides. You can even build it on your own! It's also environmentally-friendly since the wood used as the base of the structure is recycled! Your sheep will have the coolest digs around.
Step 1: The Wood
I went to my pile of recycled wood.
Step 2: Tools
For marking out I used a nail and string (or wire) some cheap paint, a large protractor and a length of wood.
Started off drawing one 6ft circle, which I then divided into 3 equal parts, these were then used as centres to draw the 3 interlocking circles.
The tools during construction were a hammer and saw.
Step 3: Layout
I laid out the bottom layer of blocks (12 to each circle)
These are 12 inches (30cm) long pieces of 4×2
The middle ones are in there just for positioning and will be removed.
Step 4: The First Few Layers
The second layer was offset across the gaps of layer 1 and nailed into position.
I have left 3 gaps as entrys, there are small 4×4 blocks to build up the jamb
All blocks are 12 inches.
Step 5: Door Jambs
I cut 3 longer pieces of 8×2 as door top lintels (approx 1m long)
Step 6: Tapering In
After about 15 layers I started tapering in by using smaller blocks
Firstly a couple of layers of 11 inch, then 10 inch ,9,8,7 etc
I did have to “wing it” a bit on the “indents” where the circles meet as each piece in there becomes longer or differently shaped
Step 7: Roof
I used 6x2s as a triangular frame from above each door and a second smaller triangle on top between each “indent”


Have you been able to make this sheephive for your animals?
Article & Photo Source: Instructables
Jeremiah Jones
Now that’s cool
Kristi Alvey