
It might take a few tries to get splicing down, but its numerous benefits make it worthwhile. If you've researched paracord splicing before, then you've probably found plenty of video tutorials and guides. Unfortunately, some of them focus on the looks of the splice as opposed to its strength. As a result, this guide focuses on creating that secure and dependable paracord splice so you can utilize its full potential without getting tangled in knots.
Step 1: Before We Start…
When you work with paracord you should use knifes or scissors suited for cutting it without frailing the fine fibres.
- # Paracord or 4mm fid(s) of your choosing
- # Locking hook needles in various sizes – those from the fish and tackle store do just fine
- # A safe source of fire – I suggest a lighter
- # Some waxed dental floss for some of the advanced parts of the lessons
- # 550 paracord
I might suggest some additional things in the advanced parts.
Step 2: Lesson One: Splicing Two Cords Together
When it comes to the end of the line you always have to decide if a quick knot or a slightly more complicate splice is required.
Mil spec 550 cord will support 550LBS of load.
That makes around 250kg for those in the other parts of the world.
Most of us go cheap instead of buying a certified cord, so lets be safe and assume a sound 200kg that we want to keep.
With that in mind we must create a connection that is both flexible enough and able to keep the load rating of the cord as high as possible.
Of course this is only possible if the thin core lines are spliced correctly and with the most support possible.
For this relatively simple task I will use a standard fid and a hooksize that fits the purpose depending how much the core lines dare to resist me.
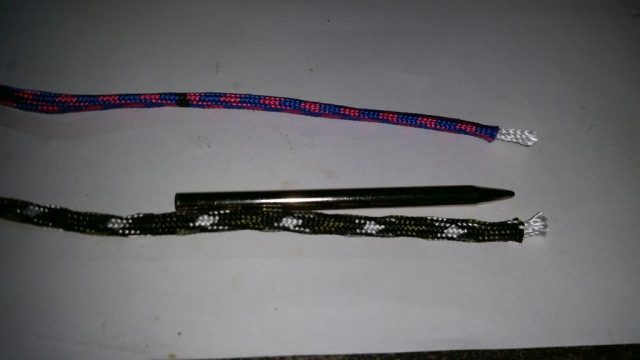
We start by marking the two cords so we end up with equal lengths on both of them.
I suggest to simply use the length of a standard fid as a guide as seen at the start of the video.
When working with long lines you should stretch the sleeve and then secure the line with some nice knot.
I concentrate on the splice only.
After marking the sleeve use the fid to open the cord and then mark the inner lines as well – this will make sure sleeve and cores are at equal lengths when we are done.
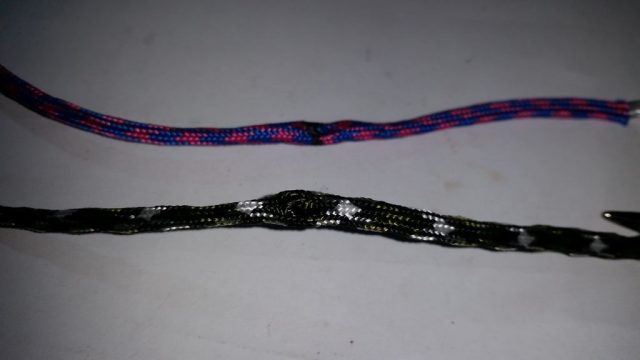
If you know the “Brummel Lock” or the “Manny” for gutted cord you already know that we need to literally lock the two sleeves of the cord to support proper loads.
The Brummel Lock in it's standard form works for ungutted cord as good as gutted but it does not support the maximum load this way.
This is the reason why I removed the core lines.
I also don't use simple holes for this lock but instead feed the needle through the sleeve a bit – about twice as long as the cord is wide.
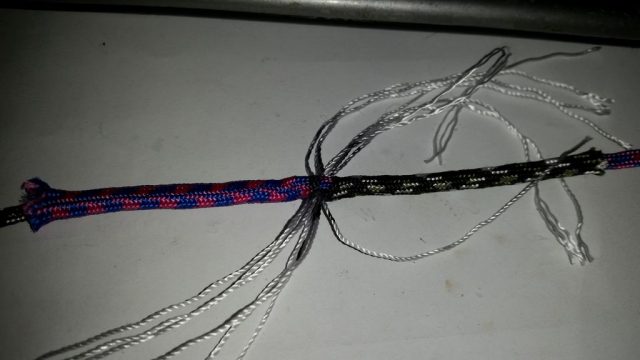
Pay close attention where and how you lock the sleeves!!
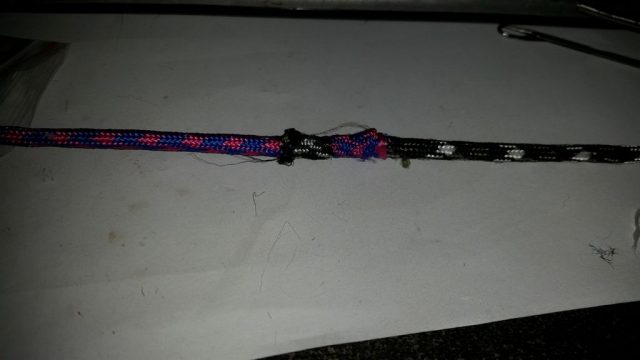
I twisted one sleeve to show you how bad it would to leave it like this – I fixed that right after taking the pic.
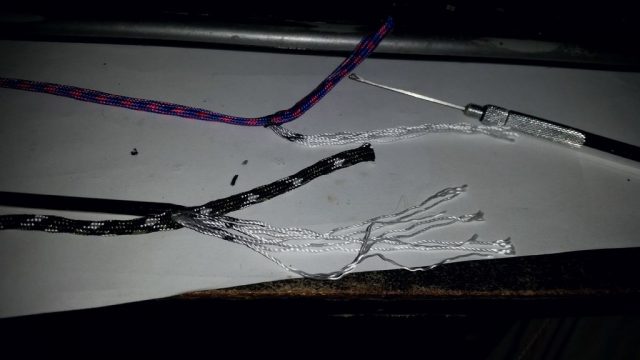
I used a hook to get the core out but you can do it the way you prefer.
Now the other ends of the lines are fed through the gutted cord to create our lock.
On longer lines it pays off to have metal tube for this feeding to prevent the core from bruning the fibres when pulling it through.
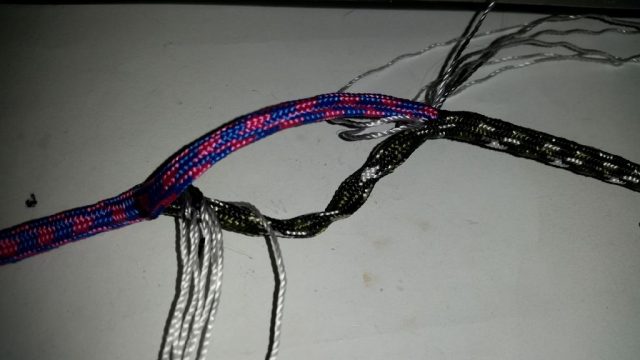
It can be a bit tricky to pull on the core lines and sleeves together until the markings on the core lines are right in our hole.
I prefer to do this in two stages, meaning I pull the sleeves first and then pull the core lines or stretch the sleeves.
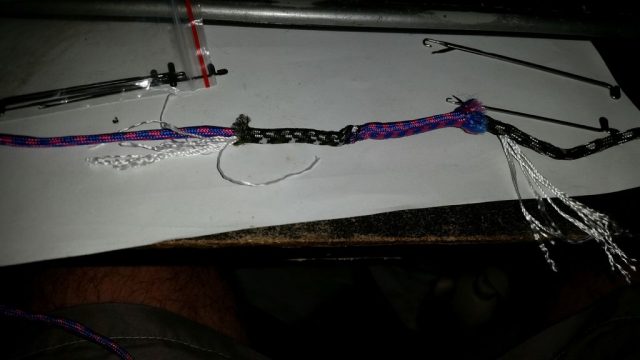
Again I used fid and hook to feed the cores lines to the outside, making sure I have enough sleeve compressed so the cores will go fully inside once stretched.
To make sure we have a smooth transition the core lines are thinned out towards the end – I do this step right before pulling it all in.
If you have the markings on the core lines quite far out as a bit above image shows then stretch the sleeves first to get the markings as close to the joint as possible.
Again it pays off to work with knots once the cords are stretched so you don't have to do this task for the entire length of your line!
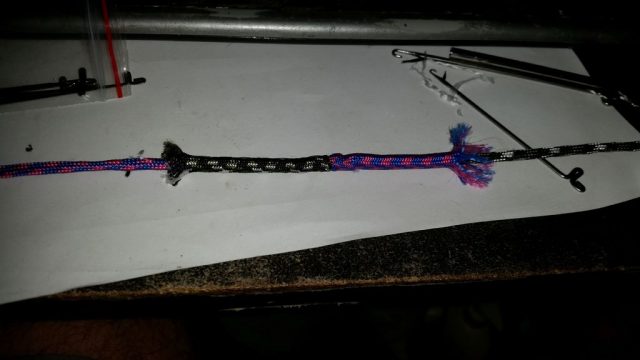
In the above images you see that the core is fed to the outside, on the right the core is already thinned out.
The sleeves are still compressed, when stretched out I inserted the hook about 2cm above the length I need for the core to disappear.
If you don't mind or even prefer a bit of stiffness you can now use waxed dental floss to make half hitches around the sleeve, starting from the joint area in both directions.
You should fix the cord between two mounts to keep it under tension and then pull the free sleeves and secure them with a rubber band or so.
This is the prefered option for maximum strength but for this you need to pull the knots with the dental floss or braided line really tight after making sure the sleeves and cores are aligned properly.
For a better optical look and better finnish we can also make the sleeve ends disappear into the other sleeve.
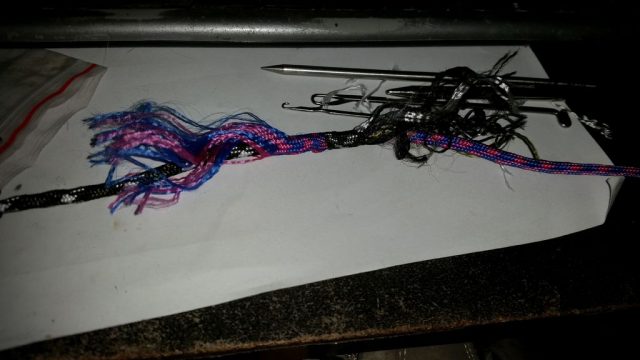
To do this we first open the sleeve to get the more individual strands.
Next step is to pull them through the core like before with the core lines.
A nice finnish is done with careful opening of the webbing.
I also fed it all through one hole, using two on oppsite sites of the sleeve looks even better but is really hard to do properly as everything inside is pushed around as well.
For the use in pulley systems or similar I still suggest to add some dental floss, otherwise the connections done now.
If done properly and for max strength with at least twice the fid lenght in core line to go into the other sleeve, the load capacity should be still over 80% of our 200kg target area, 160kg.
With dental floss half hitches pulled really tight over the exposed sleeves you should get 90% or more.
Step 3: Things You Should Never Do to Paracord If You Need the Full Strength.
People like to think the 250kg rating for 550 paracord means it will always endure at least that much.
Consider how the cord works:
The core lines give the most strength.
The sleeve adds to this and protects the core.
But only when the sleeve is fully stretched over the core to form a tight grip the cord will have maximum strength.
For this reason proper Mil spec paracord is sealed on both ends AFTER the sleeve was stretched to specs.
All cuts are done with hot knifes or similar tools and this bond between sleeve and core is only cut off once the side of the cord you work with is secured with a proper knot to prevent this balance from tipping.
So you should really never, ever just cut the cord or core lines without consideration.
A common practise is to just cut off the core if it hangs out of the sleeve for ease of working with the cord.
Every time you do this the sleeve is getting LONGER.
So long before the sleeve stops stretching and forming a tight fit the core lines will simply stretch or break under load.
For the usually low quality and unsealed paracord I prefer to seal one end and than use thick welding gloves and a lot of force to run along the sleeve to stretch it as full as possible.
Quite often the core lines disappear here as the stuff was taken from big rolls without any attention to detail.
To prevent this you can loop the core lines out of the sleeve a bit further and cut the sleeve off.
This way you can mark the core after each stretch until it is tight.
Once done lock with some pliers or similar, clean cut and hot seal.

For an additional way to splice paracord, click on the article source link below!
Have you been able to create a strong paracord by splicing? Let us know if you have any advice!
Article and Photo Source: Instructables